

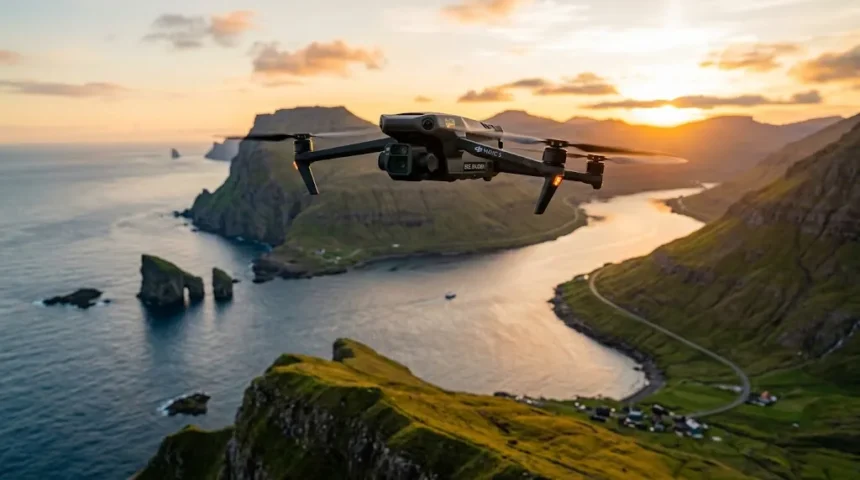
Drone Photography: Tips, Uses & How to Get Started
Drone photography has changed the way people capture landscapes, real estate, travel destinations, events, construction sites, farms, and commercial projects. Instead of relying only on ground-level cameras, photographers can now create aerial images that reveal patterns, scale, symmetry, and perspectives that were once difficult or expensive to achieve. Modern camera drones are easier to fly, more stable, and more capable than earlier models, which makes aerial photography increasingly accessible to beginners. However, owning a drone is only the first step because good results depend on understanding composition, camera settings, weather, flight safety, local regulations, and responsible operation. A skilled drone photographer thinks like both a pilot and a visual storyteller. Whether you want to photograph for fun, build a creative portfolio, promote a business, or explore professional drone photography, learning the fundamentals can help you create stronger images while flying safely and legally.
What Is Drone Photography?
Drone photography is the practice of capturing still images from an unmanned aircraft equipped with a camera. Most photography drones use multiple rotors, GPS positioning, stabilization systems, and a motorized gimbal that keeps the camera relatively steady while the aircraft moves. This combination allows photographers to capture sharp aerial photographs from heights and angles that would be difficult to reach from the ground. A drone can hover over one position, move slowly around a subject, or climb to reveal a broader scene. The photographer controls both the aircraft and the camera, usually through a remote controller or connected mobile device. Because flight and photography happen simultaneously, drone photography requires a combination of technical, creative, and piloting skills.
The most obvious difference between drone photography and conventional photography is perspective. A ground photographer normally works from eye level or uses elevated structures, while a drone can position the camera above buildings, trees, roads, coastlines, and other subjects. This creates opportunities for top-down compositions, wide environmental views, and unusual geometric patterns. Roads can become leading lines, agricultural fields can appear as abstract shapes, and buildings can be photographed within their surrounding neighborhoods. Aerial perspective can also make familiar locations feel completely different. The strongest drone images do more than simply show that the camera is high in the air; they use altitude intentionally to reveal something meaningful about the subject.
Modern consumer drones often include high-resolution cameras, RAW photo capture, automated exposure controls, obstacle sensing, and intelligent flight modes. Some models use relatively large camera sensors that can capture impressive detail and dynamic range under suitable lighting. RAW files are particularly valuable because they preserve more image information for later editing than heavily compressed image formats. Many drones can also automatically bracket exposures, create panoramas, or track subjects. These features make sophisticated aerial photography easier, but they do not replace an understanding of light and composition. Automatic modes can help capture technically usable images, while creative decisions determine whether those photographs are memorable.
Drone photography should also be distinguished from drone videography, even though many photographers do both. Aerial video focuses heavily on movement, smooth flight paths, frame rates, and cinematic sequencing, while still photography prioritizes the quality of individual frames. A great photograph may require hovering in one precise position and waiting for the right light rather than flying continuously. Shutter speed, ISO, aperture where available, and exposure bracketing are especially important considerations for still images. Photographers can also rotate the drone and tilt the gimbal independently to fine-tune composition. Developing separate strategies for photos and video usually produces better results than treating the two formats as identical.
Another important part of drone photography is responsibility. Drones share airspace with aircraft and can also affect people, wildlife, private property, and sensitive locations on the ground. A technically impressive photograph is not worth creating if the flight puts others at risk or violates applicable rules. Drone pilots need to understand the restrictions governing where and how they can fly in their region. They should also respect temporary restrictions, controlled airspace, protected sites, crowds, and local privacy expectations. Regulations can change and vary substantially between countries and locations. Good drone photography therefore begins with preparation and responsible flight planning before the aircraft ever leaves the ground.
Why Drone Photography Has Become So Popular
One major reason drone photography has become popular is that aerial imagery is no longer limited to helicopters, airplanes, cranes, or expensive production crews. A relatively compact camera drone can now provide photographers with access to viewpoints that previously required significant budgets and logistical planning. This accessibility has opened aerial photography to travel creators, small businesses, real estate professionals, wedding photographers, construction teams, and hobbyists. The technology also continues to become easier to operate. GPS-assisted hovering, return-to-home functions, obstacle detection, and stabilized gimbals reduce many of the challenges associated with early consumer drones. Beginners can therefore spend more time thinking about photographs and less time constantly correcting aircraft movement.
Social media has also increased demand for visually distinctive aerial content. Viewers are accustomed to seeing countless conventional photographs of popular destinations, so an unusual aerial perspective can immediately attract attention. A top-down photograph of a winding road, beach, swimming pool, or city intersection can create an image that feels more graphic and unexpected. Tourism businesses and hotels often use drone photos because aerial views can communicate the scale and surroundings of a property quickly. Travel photographers use them to show how landscapes connect rather than presenting only isolated landmarks. The ability to create dramatic visual context makes aerial photography particularly useful in crowded digital environments where strong imagery needs to capture attention quickly.
The real estate industry has become another major driver of drone photography. Traditional property images show interiors, facades, and individual features, while aerial photographs can reveal lot size, surrounding roads, nearby amenities, landscaping, and neighborhood context. This is particularly valuable for larger homes, commercial buildings, rural properties, resorts, and development sites. Aerial images can make listings feel more complete when they are used accurately rather than exaggerating the property. Commercial drone photographers may also produce overhead maps or progress imagery for developers and construction firms. Because these applications have practical business value, professional drone photography extends far beyond artistic landscape work.
Improvements in camera technology have also made drones more attractive to serious photographers. Better sensors, improved lens quality, stabilized gimbals, stronger dynamic range, and intelligent exposure features have narrowed the quality gap between dedicated cameras and compact aerial systems. Some drones can capture detailed RAW files suitable for large displays or commercial editing workflows. High-resolution panoramas can produce even larger final images by combining multiple photographs. Improved batteries have also extended practical flight times compared with earlier generations. These developments allow photographers to plan more carefully and capture multiple compositions during a single flight. Better image quality has transformed drones from novelty devices into legitimate photographic tools.
Finally, drone photography combines technology with exploration, which makes the process enjoyable for many people. Flying to a new viewpoint can reveal patterns and relationships that were invisible from the ground. A familiar park may contain symmetrical pathways, a river may curve through a landscape in unexpected ways, and ordinary rooftops can form striking geometric compositions. This sense of discovery encourages photographers to look differently at locations they already know. At the same time, flight introduces additional responsibilities and technical challenges that keep the activity engaging. For people who enjoy both photography and technology, a drone can become a powerful creative tool that expands rather than replaces traditional photography.
How to Choose a Drone for Photography
Camera quality should be one of the first factors considered when choosing a drone for photography. Sensor size, resolution, lens quality, dynamic range, and RAW capability all affect how much detail and editing flexibility the camera can provide. A larger sensor generally performs better in challenging lighting and can preserve more information in highlights and shadows, although image processing and lens quality matter as well. Beginners do not necessarily need the most expensive camera system available. A reliable midrange drone with RAW capture and a stabilized gimbal can produce excellent images when used carefully. The best drone is one that matches your photographic goals, budget, local regulations, and willingness to carry equipment.
Flight stability is equally important because a high-quality camera is only useful if the drone can hold a stable position. GPS positioning and modern flight controllers help drones hover accurately even when the pilot is not constantly adjusting the controls. A three-axis gimbal stabilizes the camera independently from many aircraft movements, reducing blur and allowing precise framing. Wind resistance also matters, especially for landscape and coastal photography where conditions can change quickly. Small lightweight drones may be highly portable but can struggle more in strong winds than larger aircraft. Manufacturers often provide wind-resistance guidance, but pilots should use conservative judgment rather than trying to prove that a drone can handle extreme conditions.
Battery life influences both convenience and photographic opportunities. Real-world flight time is usually lower than the maximum figure advertised because wind, temperature, flight speed, altitude changes, and battery age affect endurance. Professional and serious hobbyist photographers commonly carry several batteries so they can explore multiple compositions without rushing. A photographer might use one flight for scouting and another for capturing images during the best light. Spare batteries are especially useful when traveling to locations that are difficult to revisit. However, battery management also requires responsibility. Batteries should be stored, charged, transported, and inspected according to manufacturer instructions because damaged lithium batteries can present safety risks.
Obstacle sensing can make flying easier, particularly for beginners, but it should not create false confidence. Sensors may detect obstacles in certain directions and under favorable lighting, yet thin branches, cables, reflective surfaces, and low-contrast objects can still be difficult to identify. Some drones provide nearly omnidirectional sensing, while others protect only selected directions. Photographers should understand exactly which areas their aircraft can and cannot monitor. Automated avoidance systems are useful as backup safety features rather than substitutes for visual awareness. A pilot who is concentrating heavily on camera composition can easily become distracted from surrounding hazards. Maintaining situational awareness remains essential regardless of how advanced the drone appears.
Portability should also influence the buying decision. A smaller folding drone may be far more useful to a travel photographer than a larger system that rarely leaves home because it is inconvenient to carry. Weight can also affect registration or regulatory requirements in some jurisdictions, making lightweight drones attractive for certain users. Larger professional systems may provide better cameras, interchangeable lenses, or additional payload capabilities but usually cost more and require more planning. Consider the complete setup, including controller, spare batteries, charger, memory cards, filters, carrying case, and any required accessories. Choosing a drone based on your real workflow rather than specifications alone usually leads to greater long-term satisfaction.
Best Drone Photography Tips for Better Images
The first major drone photography tip is to plan the photograph before taking off. Flying randomly while hoping to discover a perfect composition wastes battery and can increase risk because attention becomes divided between searching and piloting. Use maps, satellite imagery, weather information, and ground-level scouting when appropriate to understand the location in advance. Identify possible subjects, sun direction, obstacles, access points, and safe takeoff areas. Think about whether the scene will work better from directly above or from a lower oblique angle. A clear plan does not prevent experimentation, but it gives each flight a purpose. The strongest aerial photographers often spend significant time planning before using any battery power.
Light matters just as much in aerial photography as it does on the ground. Early morning and late afternoon often create warm tones, long shadows, and dimensional landscapes that can look more dramatic than flat midday light. Long shadows are particularly valuable from the air because they can reveal the shape of trees, buildings, hills, and other structures. However, midday light can work beautifully for top-down images, especially when photographing clear water, geometric architecture, or strong colors. The best time depends on the subject rather than one universal rule. Monitor exposure carefully because bright skies, reflective roofs, snow, or water can create strong contrast. RAW capture provides more flexibility when recovering difficult highlights and shadows later.
Composition becomes especially important because the aerial viewpoint can easily tempt beginners to photograph everything simply because it looks unusual from above. Apply familiar visual principles such as leading lines, symmetry, negative space, repetition, framing, contrast, and the rule of thirds when they improve the image. Roads, shorelines, bridges, fences, and rivers often create powerful lines through the frame. Directly overhead images can turn fields, buildings, and parking areas into abstract geometric designs. Lower-altitude angled photographs provide more depth and can better communicate scale. Try multiple heights rather than assuming the highest legal altitude will produce the strongest photograph. Often, a lower viewpoint creates a more intimate and distinctive composition.
Use exposure bracketing when the scene contains very bright highlights and deep shadows. Many drones offer automatic exposure bracketing, which captures several photographs at different exposure levels. These images can later be combined carefully into a high dynamic range photograph or used individually depending on which exposure works best. Bracketing is particularly useful during sunrise, sunset, and scenes involving dark land beneath a bright sky. Avoid extreme HDR processing that makes the photograph appear unnatural unless that is an intentional creative choice. The objective is usually to preserve realistic detail rather than eliminate every shadow. Because the drone can hover steadily, exposure bracketing is often easier to accomplish than with a handheld camera.
Finally, capture more than one orientation and composition whenever time and safety allow. Some drones can rotate the physical camera vertically, while others require cropping a horizontal image for portrait-oriented social media. Consider where the photograph will eventually be used before deciding how tightly to frame the subject. Leave extra space when clients may need room for text or different aspect ratios. Shoot a wide establishing image, a medium composition, and tighter details where appropriate. Small changes in altitude or gimbal angle can produce dramatically different results. A thoughtful variety of images gives you more options during editing and creates a stronger final collection than dozens of nearly identical frames.
Drone Camera Settings Beginners Should Learn
Shooting in RAW is one of the most valuable settings for anyone serious about drone photography. RAW files preserve substantially more image information than standard JPEG files, which gives you greater flexibility when adjusting exposure, highlights, shadows, white balance, and color during editing. JPEG images can still look excellent straight from the camera and require less storage, but they contain less recoverable information. Many drones allow photographers to record RAW and JPEG simultaneously, providing both convenience and editing flexibility. Larger files require bigger memory cards and additional storage space, so plan accordingly. For important landscapes, real estate, and commercial work, RAW capture is generally worth the additional file-management effort.
ISO controls the camera’s sensitivity and should usually remain as low as practical for the cleanest aerial photographs. High ISO settings can introduce visible noise and reduce fine detail, particularly on drones with smaller camera sensors. In bright daytime conditions, base ISO is often easy to maintain while still using sufficiently fast shutter speeds. As light decreases, photographers need to balance noise against motion blur. Because a drone is never perfectly motionless in the air, very slow shutter speeds can become risky even with an effective gimbal. Calm conditions improve the chance of success, but it is wise to capture multiple frames when using slower exposures. Review images carefully for sharpness rather than assuming stabilization guarantees perfect results.
Shutter speed controls how long the camera sensor is exposed to light. For most still aerial images, a fast enough shutter speed helps freeze movement caused by the aircraft, wind, moving trees, waves, vehicles, or people. Faster shutter speeds are especially helpful in stronger wind because the drone may make constant small adjustments. Creative slow-shutter photography is possible with neutral-density filters and calm conditions, allowing water or moving traffic to blur intentionally. However, this technique requires experimentation because even small aircraft movement can soften the entire image. Beginners should first learn to produce consistently sharp photographs before focusing heavily on long exposures. Technical reliability provides a stronger foundation for creative experimentation.
White balance controls the overall color temperature of the photograph. Automatic white balance works reasonably well in many situations, but it can shift slightly between frames as the camera interprets changing light. Setting a fixed white balance can provide more consistent color across a series of photographs, which is particularly useful for panoramas or commercial work. RAW files allow substantial white-balance adjustment later, but consistent capture still simplifies editing. Warm sunrise conditions, cool shadows, and mixed urban lighting can all influence the appropriate setting. Instead of obsessing over an exact number while flying, aim for consistency and natural-looking color. The final refinement can be completed during post-processing.
Some higher-end drones provide adjustable apertures, while many compact models use a fixed aperture. If aperture control is available, understand that very small apertures are not always the sharpest choice because diffraction can reduce fine detail. Midrange apertures often provide a useful balance between sharpness and exposure control. Depth of field is generally generous in aerial landscapes because subjects are often relatively far from the camera. Neutral-density filters are more critical for video than ordinary still photography, but they can also enable creative long exposures in bright conditions. Mastering ISO, shutter speed, RAW capture, exposure compensation, and white balance provides more practical value than constantly changing every available setting.
Common Uses of Drone Photography
Real estate is one of the most commercially established uses of drone photography. Aerial images can show a property’s layout, driveway, land boundaries, landscaping, nearby roads, surrounding environment, and relationship to neighboring features. This wider context is especially useful for luxury homes, farms, resorts, commercial properties, and large development sites. Drone images should complement interior and ground photography rather than replace them. Accurate representation matters because extremely wide or misleading angles can distort the perceived size of a property. Professional operators also need to understand applicable rules for commercial flights. When used responsibly, aerial photography can make real estate marketing more informative and visually compelling.
Travel and tourism provide another major application. Hotels, resorts, tourism boards, tour operators, and travel creators use aerial photography to highlight coastlines, mountains, islands, historic areas, and natural attractions. A drone can show the relationship between a hotel and a beach or reveal the scale of a hiking route in a way ground photography cannot. However, popular tourist locations often have strict flight restrictions due to crowds, airports, wildlife, heritage protections, or local regulations. Photographers should never assume that a beautiful destination automatically permits drone flight. Planning legal access is part of professional travel photography. A responsible photographer may sometimes need to choose a ground-based alternative rather than forcing an aerial shot.
Construction and infrastructure industries use drones for documentation, progress monitoring, and visual communication. Regular aerial images can show how a building site changes from one stage to another, helping project teams and stakeholders understand progress. Large sites can be photographed more efficiently from the air than from multiple ground positions. Specialized drone workflows may also create maps, three-dimensional models, or inspection imagery, although these applications require additional technical skills beyond basic photography. Construction sites contain cranes, equipment, workers, and other hazards that demand careful flight planning. Commercial operators should coordinate with site managers rather than treating the location like an ordinary landscape photography area.
Agriculture is another area where aerial imagery can provide useful information. Even standard photography can help farmers observe field patterns, irrigation issues, livestock areas, crop differences, or storm damage from a broader perspective. More advanced agricultural drones may use specialized multispectral or thermal sensors to analyze plant health and other conditions invisible to ordinary cameras. Those applications fall into remote sensing rather than traditional creative photography, but they demonstrate how versatile drone technology has become. Agricultural operations may involve large private properties, machinery, power lines, and changing weather. Permission and safe flight procedures remain essential. Drones can improve visual awareness, but professional interpretation may still be necessary for agricultural decisions.
Events, weddings, outdoor sports, environmental projects, and marketing campaigns also use aerial photography. A wedding venue can look spectacular from above, while an outdoor sporting event may benefit from wide contextual images showing location and scale. However, flying directly over crowds can create serious safety and regulatory concerns, making event photography more complicated than simply launching near the venue. Wildlife photography creates similar concerns because a drone can disturb animals even when the operator remains physically distant. Commercial marketing projects often require permissions, insurance, location coordination, and careful planning. The flexibility of drone photography creates many opportunities, but each application brings its own ethical, legal, and technical responsibilities.
How to Get Started With Drone Photography
Start by learning the regulations that apply where you plan to fly. Rules can vary according to country, drone weight, flight purpose, altitude, airspace classification, proximity to airports, and whether the operation is recreational or commercial. Some jurisdictions require registration, pilot testing, remote identification, or specific operating permissions. Regulations also change over time, so old online tutorials may no longer reflect current requirements. Use official aviation authorities or recognized local resources when checking rules rather than relying only on social media discussions. Understanding the legal framework before purchasing an expensive drone can also influence which model you choose. Responsible operation begins with knowing whether a flight is allowed in the first place.
Practice basic flight control in a large, safe, open environment before concentrating heavily on photography. Learn how the drone responds when moving forward, backward, sideways, upward, and downward. Practice smooth turns, controlled landings, hovering, and return-to-home procedures. Orientation can become confusing when the drone faces toward you because control directions may feel reversed to beginners. Repetition builds muscle memory and reduces panic during unexpected situations. Avoid starting in a complicated location surrounded by trees, buildings, people, or water simply because the scenery is attractive. Developing confidence in simple conditions first makes creative flights much safer later.
Next, practice camera control while the drone remains relatively close and easy to monitor. Learn how to tilt the gimbal slowly, adjust exposure, switch between photo modes, and review histogram or overexposure warnings if available. Practice capturing the same subject from several heights and angles. You may discover that an image taken from 20 or 30 meters looks more interesting than one taken near the maximum permitted altitude. This exercise teaches you to use elevation intentionally rather than treating height itself as the goal. Try photographing roads, trees, buildings, or simple geometric subjects before traveling to complex landscapes. Local practice is inexpensive and gives you more opportunities to experiment.
Build a basic preflight routine before every session. Check the aircraft, propellers, controller, battery levels, memory card, firmware status, weather, local restrictions, and surrounding environment. Confirm that the takeoff area is clear and that the home point has been recorded correctly where applicable. Think about the direction you will fly and how much battery will be required to return safely, especially when wind is present. Strong headwinds on the return journey can consume battery faster than expected. Avoid launching merely because the battery display looks full if conditions are unsuitable. A consistent checklist reduces preventable mistakes and allows you to concentrate more confidently on photography once airborne.
Finally, edit and review your work after each flight rather than measuring progress only by the number of photographs captured. Ask why certain compositions succeed and why others feel flat or confusing. Examine sharpness, exposure, noise, color, horizon level, and subject placement. Notice whether you flew too high, used excessive empty space, or failed to capture enough variations. Editing software can improve color and tonal balance, but it cannot rescue every weak composition. Learning from each flight gradually improves both piloting and photography. The fastest way to become a better drone photographer is not simply flying more often; it is flying with a purpose and reviewing the results critically afterward.
Drone Photography Safety and Legal Considerations
Visual awareness is one of the most important parts of safe drone operation. Pilots should know where the aircraft is and what is happening around it rather than relying entirely on the live camera feed. A screen provides only the camera’s limited field of view and may not show an aircraft, bird, cable, or obstacle approaching from another direction. Bright sunlight can also make displays difficult to see. Maintaining an appropriate visual line of sight is required in many jurisdictions and improves situational awareness even where rules differ. A visual observer may help during certain operations where regulations permit. Photography should never become so absorbing that the pilot stops actively managing the aircraft.
Weather should be evaluated conservatively. Strong winds can reduce control authority, increase battery consumption, and make return flights difficult. Gusts may be stronger at altitude than at the launch point, meaning calm ground conditions do not guarantee an easy flight above nearby obstacles. Rain, snow, fog, and extreme temperatures can also affect electronics, visibility, batteries, and image quality. Consumer drones are not automatically waterproof even if they appear durable. Check local conditions before leaving and continue observing weather changes during the flight. If the environment begins deteriorating, landing early is usually preferable to trying to complete one final photograph.
People and property deserve careful consideration. Flying directly above uninvolved people can create unnecessary danger if the aircraft fails or loses a component. Crowded parks, beaches, concerts, weddings, and sporting events may also have specific regulatory restrictions. Respect private spaces and avoid photographing people in situations where they reasonably expect privacy. The fact that a camera can see a property from the air does not automatically mean every form of recording is appropriate or lawful. Commercial jobs should clarify permissions and boundaries before flight. Responsible pilots consider how their aircraft affects people on the ground rather than thinking only about what the camera can capture.
Wildlife requires similar respect. Birds may perceive drones as threats, particularly around nests, breeding areas, or feeding sites. Some birds may become stressed, flee, or even attack the aircraft. Mammals can also change behavior when repeatedly approached by a noisy drone. Protected natural areas frequently impose restrictions specifically to reduce disturbance. A dramatic wildlife photograph does not justify harassing an animal or forcing it to move. Use longer distances and appropriate ground photography when aerial operation could cause stress. Conservation-minded drone photography recognizes that minimizing impact is more important than capturing a unique image.
Emergency planning should be part of every flight. Know how your drone behaves during low battery, signal loss, GPS problems, or return-to-home activation. Set return altitude appropriately for the local environment while remaining within applicable legal limits. Confirm that the home point is safe and avoid allowing the aircraft to descend automatically into obstacles. Keep enough battery reserve to respond to unexpected wind or route changes rather than landing with nearly zero remaining capacity. If equipment behaves unusually, prioritize a controlled landing over finishing the shoot. Good pilots are not defined by never encountering problems; they are defined by preparation, conservative decisions, and appropriate responses when conditions change.
How to Edit Drone Photos for a Professional Look
A strong editing workflow begins with selecting the best photographs rather than trying to process every file. Compare similar frames for sharpness, composition, light, and subject placement, then choose the strongest versions. Flying drones often produces multiple near-identical images because photographers bracket exposures or capture several frames for safety. Removing weaker duplicates keeps the editing process manageable. Check the entire frame for unwanted distractions such as propeller shadows, people, vehicles, or awkward objects near the edges. Editing should improve an already promising image rather than becoming an attempt to manufacture quality from an uninspired photograph. Careful selection is one of the most overlooked parts of professional photography.
Start tonal adjustments by correcting exposure while protecting important highlight information. Bright clouds, reflective water, and pale buildings can easily lose detail if pushed too far. Open shadows carefully where necessary, but avoid eliminating all contrast because depth and dimension often depend on darker areas. RAW files provide greater flexibility during these adjustments. Aerial landscapes can sometimes appear hazy because of atmospheric distance, so modest contrast or dehaze adjustments may improve clarity. Excessive processing can create halos, unnatural skies, or harsh textures. The goal is generally to make the photograph reflect the visual character of the scene while improving readability and balance.
Color editing should remain intentional. Adjust white balance first so the overall temperature feels believable before increasing saturation. Drone photographs often contain large areas of green vegetation, blue water, or warm soil, which can become unrealistic quickly when global saturation is pushed too high. Selective color adjustments provide greater control when one part of the photograph needs refinement. A sunrise image may benefit from warmth, while a foggy landscape may look stronger with more restrained color. There is no requirement that every aerial image appear extremely vibrant. Consistent color grading is particularly useful when producing a portfolio or commercial set where several images need to feel visually connected.
Lens corrections, horizon alignment, and perspective adjustments can improve the technical polish of an aerial photograph. Although drones maintain relatively stable orientation, horizons can still appear slightly tilted because of wind, gimbal calibration, or aircraft movement. Small corrections make landscapes look more professional. Architectural drone photography may require additional attention because buildings can appear distorted when photographed at strong angles. Cropping can strengthen composition but should avoid removing too much resolution, particularly if the image will be printed large. Use local adjustments where necessary to guide attention rather than applying every change globally. A subtle edit often appears more professional than an aggressive one.
Sharpening and noise reduction should be applied according to the camera and final output size. Excessive sharpening can create crunchy textures around trees, rooftops, and fine patterns, while too much noise reduction can make surfaces look artificial and waxy. High-ISO files generally require more careful treatment than bright daytime photographs captured at base ISO. Export settings should match the intended destination, whether that is a website, social media post, client gallery, or large print. Preserve full-resolution master files so future versions can be created without repeatedly compressing the image. A consistent backup strategy is also important because aerial photographs may be impossible to recreate once travel, weather, or access conditions change.
FAQs About Drone Photography
Is drone photography difficult for beginners?
Drone photography is relatively approachable because modern drones include stabilization, GPS-assisted hovering, and automated flight features. Beginners still need to learn safe piloting, camera settings, composition, weather awareness, and local flight regulations before attempting complicated shoots.
What is the best time of day for drone photography?
Early morning and late afternoon often provide attractive warm light and long shadows, making them excellent for landscapes and architecture. Midday can also work well for top-down photography, bright water, strong colors, and scenes where shadows would otherwise hide important details.
Do I need a professional camera drone to take good photos?
No, many compact consumer drones can produce excellent aerial photographs when they offer a stable gimbal, suitable camera quality, and preferably RAW capture. Strong composition, light, planning, and editing frequently matter more than buying the most expensive available drone.
Can drone photography make money?
Yes, drone photographers may earn money through real estate, construction documentation, tourism marketing, commercial imagery, events, inspections, and other services. Commercial operation may require additional certification, registration, permissions, insurance, or operating requirements depending on local regulations.
What should I learn first before flying a camera drone?
Start with local drone regulations, basic aircraft controls, battery management, weather awareness, return-to-home procedures, and safe takeoff and landing. Once you can confidently control the aircraft, focus on exposure, composition, RAW photography, and creative aerial perspectives.