
What Are Wall Push Ups?
Wall push ups are a beginner-friendly variation of the traditional push up that uses a wall instead of the floor. You stand facing the wall, place your hands against it, bend your elbows to bring your chest closer, and then push yourself back. This reduces the amount of body weight you have to move, making the exercise easier to control.
The exercise mainly targets the chest, shoulders, and triceps while also asking the core to keep the body stable. Because the movement is performed upright, it places less stress on the wrists and shoulders than many floor-based push up variations. This makes it useful for beginners, older adults, and people gradually returning to upper-body strength training.
Wall push ups can also serve as a progression toward incline, knee, and full push ups. As your strength improves, you can gradually move your feet farther from the wall or switch to a lower surface. The key is to maintain good form and controlled movement rather than rushing to a harder variation before your body is ready.
How to Set Up for a Wall Push Up
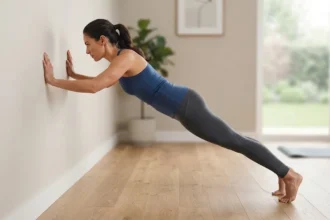
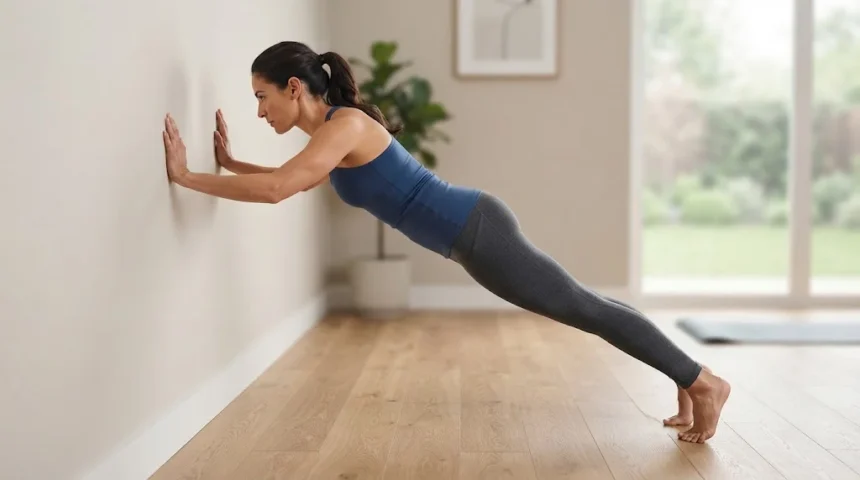
Stand facing a sturdy wall and position yourself about an arm’s length away. Place your palms flat against the wall at roughly chest or shoulder height, with your hands slightly wider than shoulder-width apart. Your fingers should point upward or slightly outward, depending on what feels most natural for your wrists and shoulders.
Step your feet back slightly so your body forms a straight line from your head to your heels. Keep your knees soft rather than locking them completely, and gently engage your abdominal muscles. Your shoulders should remain relaxed instead of lifting toward your ears as soon as you place pressure through your hands.
Before starting the first repetition, check that your hands are secure and the wall surface is not slippery. Avoid using unstable doors or lightweight furniture because they may move when you apply pressure. A solid wall gives you a safer base and lets you focus on technique instead of worrying about balance.
How to Do Wall Push Ups Step by Step
Begin with your body straight and your palms firmly against the wall. Slowly bend your elbows and allow your chest to move toward the wall while keeping your heels on the floor. Your elbows can angle slightly away from the body, but avoid letting them flare directly out to the sides.
Lower yourself until your face or chest comes close to the wall without touching it forcefully. Keep your hips from sagging forward and avoid bending only through the neck. The movement should happen through the shoulders and elbows while your torso stays controlled as one unit.
Press through your palms and straighten your elbows to return to the starting position. Do not snap the elbows into a hard lock at the top. Repeat each rep with the same smooth rhythm, focusing on control rather than speed or the total number of repetitions completed.
Muscles Worked During Wall Push Ups
The chest muscles, especially the pectoralis major, are among the main muscles used during wall push ups. They help move the upper arms forward as you push away from the wall. Although the resistance is lighter than in floor push ups, the chest still receives useful strength stimulus when the movement is performed through a controlled range.
The triceps at the back of the upper arms also contribute by straightening the elbows during the pushing phase. The front of the shoulders, especially the anterior deltoids, assist with arm movement and joint control. These muscles work together to create the basic pushing pattern used in many everyday and gym-based movements.
The core, upper back, and shoulder stabilizers help keep the body aligned while the arms move. Your abdominal muscles prevent the lower back from arching excessively, while the shoulder blade muscles support smooth movement. This means wall push ups are not only an arm exercise but a simple full-body stability drill as well.
Benefits of Wall Push Ups
One of the biggest benefits of wall push ups is accessibility. They allow people with limited upper-body strength to practice a pushing movement without lifting a large percentage of their body weight. This makes the exercise less intimidating and easier to learn before progressing to harder push up variations.
Wall push ups can also improve chest, shoulder, and arm endurance. People who find full push ups too difficult can still train the same basic movement pattern at a level they can control. Over time, increasing repetitions or changing body position can provide enough progression to build strength gradually.
The exercise may also be useful when floor-based positions are uncomfortable. People with limited mobility, difficulty getting down to the floor, or temporary lower-body discomfort may find standing exercise easier to manage. For example, someone also dealing with knee bone spur pain may prefer a standing upper-body exercise while adjusting other lower-body movements.
Common Wall Push Up Mistakes
One common mistake is standing too close to the wall. If your feet are almost touching the wall, the movement becomes very easy and may not provide enough challenge. Step back until you feel moderate resistance while still being able to maintain a straight body position throughout the exercise.
Another mistake is allowing the hips to sag toward the wall while the shoulders stay back. This reduces core involvement and changes the movement into more of a body lean than a controlled push up. Keep your head, shoulders, hips, and ankles roughly aligned as you move.
Elbow position can also become a problem if the arms flare straight out to the sides. This may feel uncomfortable for some shoulders and can reduce control. Let the elbows move at a natural angle, usually somewhere between directly beside the body and completely out to the sides.
How Many Wall Push Ups Should You Do?
Beginners can start with two or three sets of around 8 to 15 controlled repetitions. The exact number is less important than maintaining good technique. Stop the set when your form begins to change significantly or when you can no longer lower and push away from the wall smoothly.
As the exercise becomes easier, increase repetitions gradually or add another set. You can also make the movement more challenging by stepping farther away from the wall. This increases the angle of your body and makes your upper body support a greater percentage of your weight.
If you can perform many wall push ups easily without fatigue, it may be time to progress to an incline push up using a sturdy countertop or bench. Progressing the angle is often more useful than doing extremely high repetition counts. The goal is to create enough resistance to challenge the muscles while keeping technique controlled.
How to Progress From Wall Push Ups
The easiest progression is to move your feet slightly farther from the wall. This increases the amount of body weight you have to push and makes each repetition more demanding. Move only a small distance at a time so your shoulders, wrists, and chest can adapt gradually.
Once wall push ups become comfortable, try incline push ups using a sturdy countertop, railing, or bench. A lower surface creates a steeper body angle and increases the resistance. Make sure the surface is secure and can support your weight without sliding or tipping.
From there, you can progress to knee push ups or full push ups on the floor. There is no need to rush this transition. Stay with each variation until you can perform controlled repetitions with good alignment before moving to the next level.
Wall Push Ups for Beginners
Wall push ups are especially useful for people who are new to strength training. They teach basic push up mechanics without requiring advanced upper-body strength. Beginners can focus on hand position, elbow control, core engagement, and breathing before dealing with the extra difficulty of floor-based push ups.
The standing position can also make it easier to recognize technique errors. You can feel whether your hips are moving forward, your elbows are flaring, or your shoulders are shrugging. This makes wall push ups a useful teaching exercise as well as a strength exercise.
Beginners should focus on consistency rather than trying to progress as quickly as possible. Performing the exercise two or three times per week can provide enough practice for many people. Once the movement feels easy and stable, increase the challenge gradually instead of jumping directly to full push ups.
Wall Push Ups for Older Adults
Older adults may benefit from wall push ups because the exercise builds upper-body strength without requiring getting down to the floor. This can make it more practical for people with limited mobility or balance concerns. A nearby stable chair or counter can also provide extra support if needed when getting into position.
Upper-body pushing strength can help with everyday tasks such as opening doors, pushing objects, or supporting the body when standing up from a surface. Wall push ups train these muscles in a simple and scalable way. The intensity can be adjusted easily by changing how far the feet are from the wall.
Anyone with significant shoulder, wrist, heart, or balance problems should follow appropriate medical or rehabilitation guidance. The exercise is generally low impact, but individual health needs vary. Starting with a comfortable range and progressing slowly is usually more important than reaching a specific repetition target.
Wall Push Ups and Shoulder Comfort
Wall push ups can be easier on the shoulders than full push ups because the load is lower. The upright position also allows you to adjust hand height and body angle more easily. If standard floor push ups feel uncomfortable, the wall version can provide a simpler way to practice the movement pattern.
Keep the shoulders away from the ears and allow the shoulder blades to move naturally as you lower and press away. Avoid forcing them permanently together or downward. Smooth shoulder blade movement helps the upper body work more naturally during pushing exercises.
If you feel sharp shoulder pain, pinching, numbness, or tingling, stop and adjust the exercise. Try changing hand width, reducing range, or standing closer to the wall. Persistent symptoms should be assessed rather than repeatedly pushed through in the hope that the discomfort will disappear.
How to Breathe During Wall Push Ups
Breathing should remain steady throughout the exercise. Inhale as you bend your elbows and move your chest toward the wall. Exhale as you press through your hands and return to the starting position, especially during the more difficult part of the movement.
Avoid holding your breath for the entire set. Unnecessary breath-holding can increase tension through the neck and shoulders and may make the exercise feel harder than it needs to. A regular breathing rhythm can also help you maintain a smoother pace from one repetition to the next.
If you find yourself becoming very breathless, slow the exercise down or take a longer rest between sets. Wall push ups are meant to be controlled strength work, not an all-out cardiovascular challenge. Quality repetitions are more useful than rushing through the movement simply to finish faster.
When Wall Push Ups Should Be Modified
Modify the exercise if you experience wrist discomfort. Placing your hands slightly higher or changing their angle may help, or you can use a stable push up handle against an appropriate surface if available. Do not force the wrists into a position that creates sharp pain.
You may also need to shorten the range if your shoulders feel uncomfortable near the wall. Lower only as far as you can maintain control without pinching or sharp pain. Over time, the comfortable range may improve as strength and movement tolerance increase.
People recovering from surgery or a significant upper-body injury should follow individualized medical guidance. Wall push ups are often easier than floor versions, but they are still a resistance exercise. The right starting point depends on healing stage, current strength, and any movement restrictions.
Conclusion
Wall push ups are a simple, beginner-friendly way to strengthen the chest, shoulders, triceps, and core. They use less body weight than traditional push ups, making them easier to control and more accessible for people with limited upper-body strength. The movement can also serve as the first step in a gradual push up progression.
Good form involves keeping the body aligned, controlling the elbows, and moving toward the wall as one unit. Avoid sagging through the hips, shrugging the shoulders, or rushing through repetitions. As the exercise becomes easier, increase difficulty by stepping farther away or moving to a lower incline.
Wall push ups can fit into home workouts, beginner strength plans, and general fitness routines with almost no equipment. Start with manageable sets and progress gradually based on how your body responds. Consistent practice and good technique can help build the strength needed for harder push up variations over time.
FAQs
Are wall push ups effective?
Yes. Wall push ups can strengthen the chest, shoulders, triceps, and core, especially for beginners. They become more effective when you gradually increase resistance by changing your body angle.
How many wall push ups should I do?
Beginners can start with two or three sets of 8 to 15 repetitions. Increase repetitions or difficulty gradually once you can complete each set with good form and controlled movement.
Can wall push ups help me do regular push ups?
Yes. They teach the same basic pushing pattern with less resistance. Progress from wall push ups to incline push ups, then knee or full push ups as your strength improves.
Are wall push ups good for older adults?
They can be a practical strength exercise for many older adults because they do not require getting onto the floor. The difficulty can also be adjusted easily based on strength and balance.
Why do my shoulders hurt during wall push ups?
Shoulder pain may come from hand position, excessive range, poor control, or an existing shoulder problem. Reduce the range or adjust hand placement, and seek professional advice if pain persists.